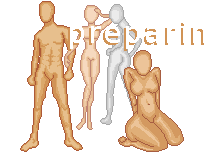

well, the first of my photoshop exclusive tutorials, 'preparing
a base in photoshop' is just a quick run-down of how I get ready to
start editing a doll. I find it's the easiest and most effective way
of getting a doll done, whilst still giving the most space for creativity
and making it REALLY easy to save the finished doll as a transparent
gif.
| 
|
step one: well, first of all, you need to choose the base you're
going to work with. here I've chosen to create a doll on my 'attitude'
base, so I've opened the gif image and am about to start dolling.
BUT before I do anything you may notice that the space around
the doll is rather small so it doesn't allow a lot of space for
editing and NONE for hair or anything similar to that. SO what
are we going to do?? we're going to quickly prepare the base so
that we can freely edit the doll with as many layers as we like
|

step two: okay, in order to set our base up for easy editing,
the first thing we're going to do is choose the magic wand tool.
at the top (and this is photoshop 6.0) you'll notice that when
you click on the magic wand tool, you'll get a few options at
the top of the window. for this purpose, make sure you make the
magic wand's tolerance level 5, and that you turn off anti-aliasing
and contiguousness.
|
 |
step three: okay, with your magic wand, just click once in the
transparent area around the base. you'll notice that ALL of the
transparent areas are then suddenly selected. this is the best
bethod of chosing only the base - so you don't get any single
white/green pixels or anything in your final doll.
|

step four: okay, now to choose the actual doll, either go to Select
-> Inverse, or simply push shift+ctrl+i on your keyboard (or
apple+option+i on a mac).
|

step five: okay, now with doll base selected, simply go to Edit
-> Copy, or push ctrl+c on your keyboard (apple+c on a mac).
|

step six: now go to File -> New, or press crtl+n (apple+n on
mac) to bring up the new file palette.
now, before clicking okay on this palette window, you must do
atleast two things. firstly, in the image size section, assign
the width and height of the new image at 300 pixels, making sure
that the resolution s at 72 dpi.
secondly, make sure you assign 'transparent' in the contents section
of the palette. if you like, you can give the new image a name,
and then click ok.
|

step seven: now you've got a new, fairly large canvas to work
with. go to Edit -> Paste, or ctrl+v (or apple+v on mac). the
base that you chose will paste in the exact centre of your new
canvas.
|
 |
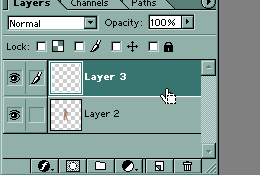
step eight: now, before you do anything else, on the layers palette
(if it is not already open goto Window -> Show Layers) press
the little icon that is second to the right (next to the rubbish
bin icon). this is the 'craete a new layer' icon and, as its name
says, it will create a new layer in the image.
|

|
step nine: now that you've got a new layer to start editing the
clothes etc on your doll, go to File -> Save or press ctrl+s
(apple+s on a mac) and save this new psd file.
now, you're all ready to edit to your hearts content with as many
layers as you like - make sure you save often though so you don't
lose your work!
|
|


